Kubeapps
Kubeapps is a dashboard for helm. You can use Kubeapps to deploy and manage your confidential applications. While we expect that most confidential applications will be deployed via the helm CLI, using a dashboard is a convenient way to inspect the running confidential as well as native applications. Moreover, the dashboard informs you when updates of the applications are available to be installed.
Prerequisites
- A Kubernetes cluster
- Helm setup was performed
Deploy and Manage
We provide a catalog with sconeapps, i.e., curated, confidential applications that can be installed with the help of helm or via point and click using Kubeapps.
Kubeapps provides you with a view of available sconeapps, like this:
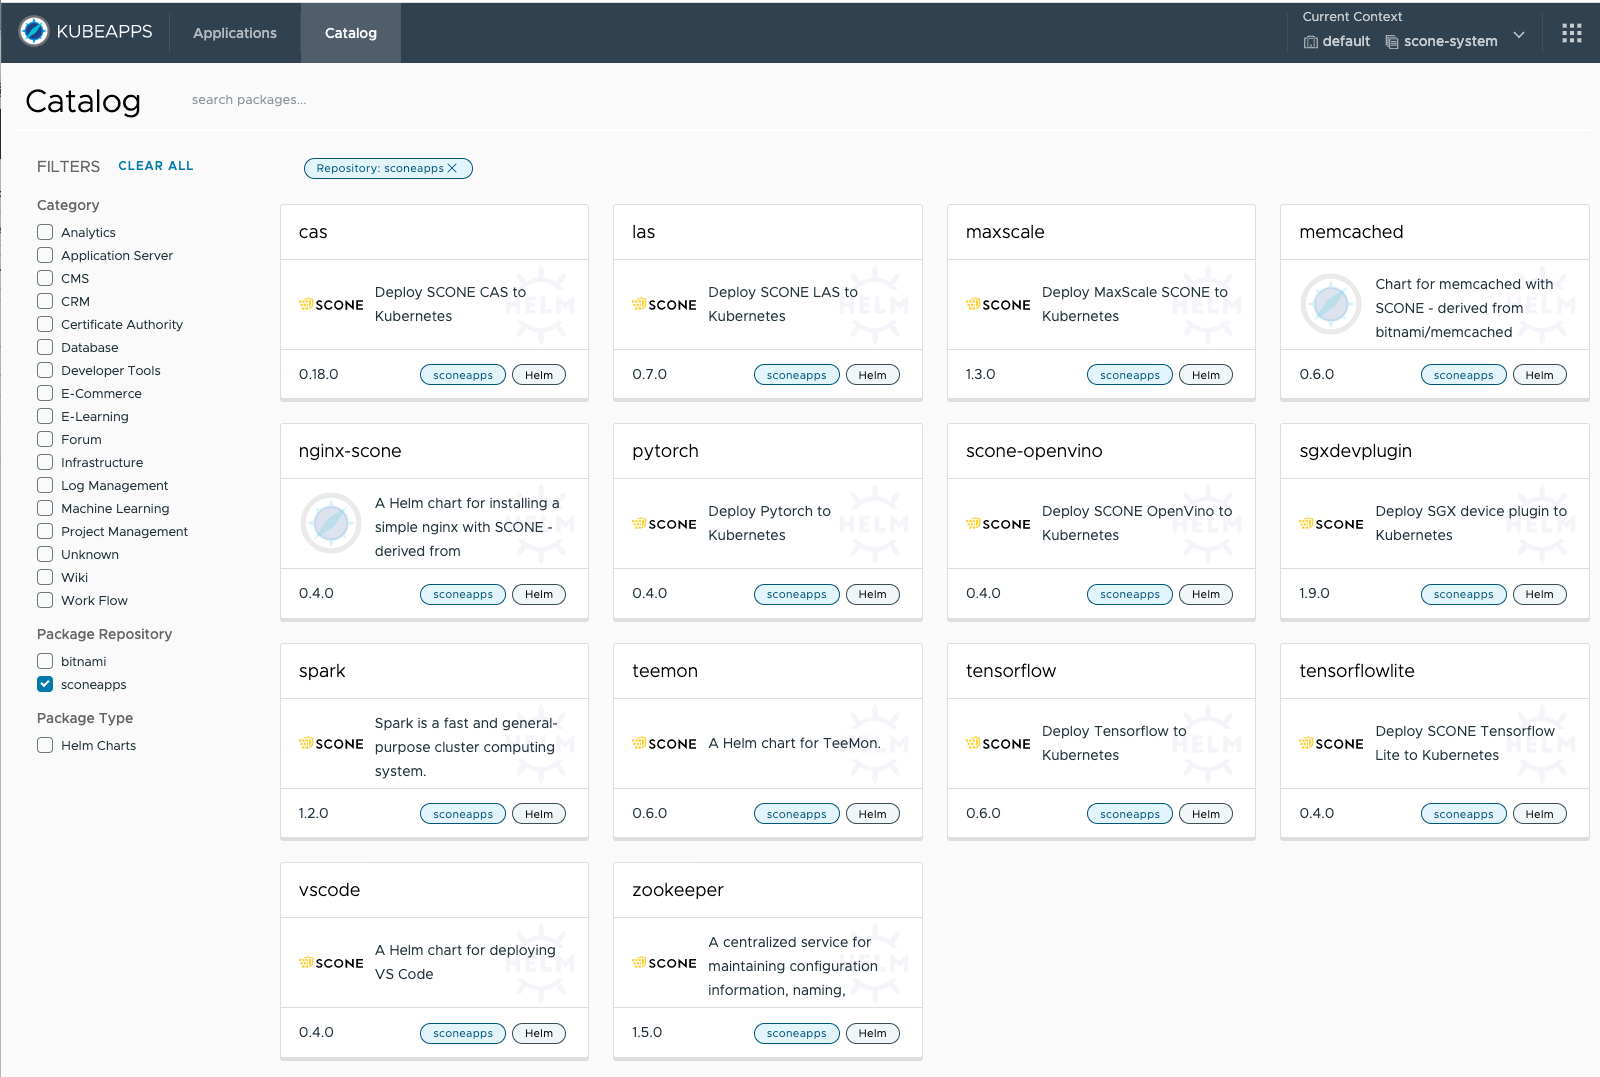
You can select an application that you want to start and deploy it as described below.
Deploy a sconeapp
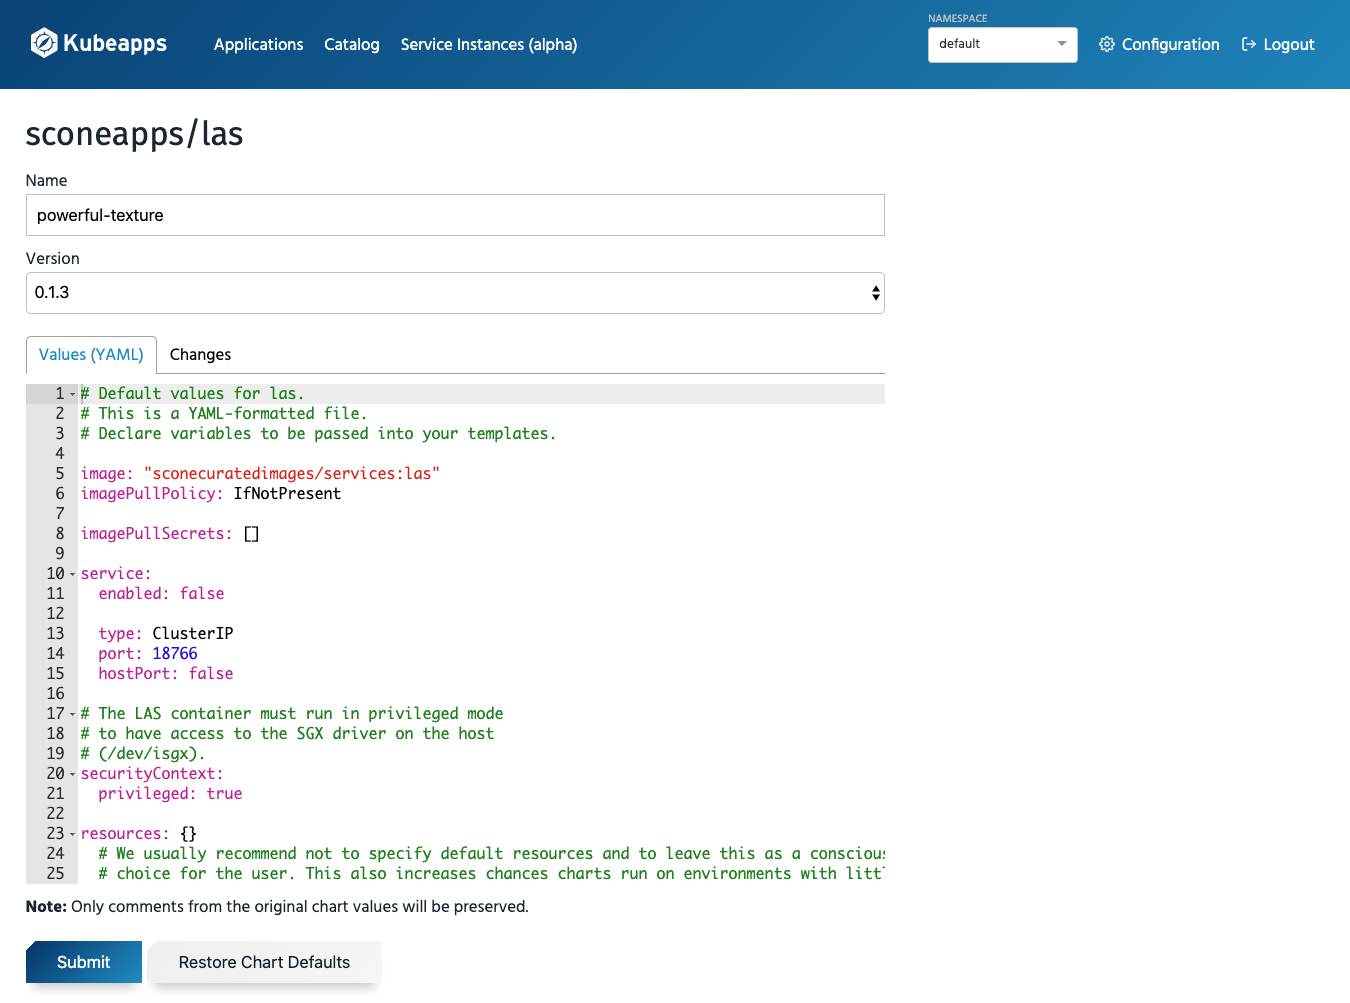
When deploying an application, you can customize its configuration values. For example, for LAS, SCONE's local attestation service, you will be able to configure the parameters of the Helm chart that is used to install this application:
Inspecting Applications
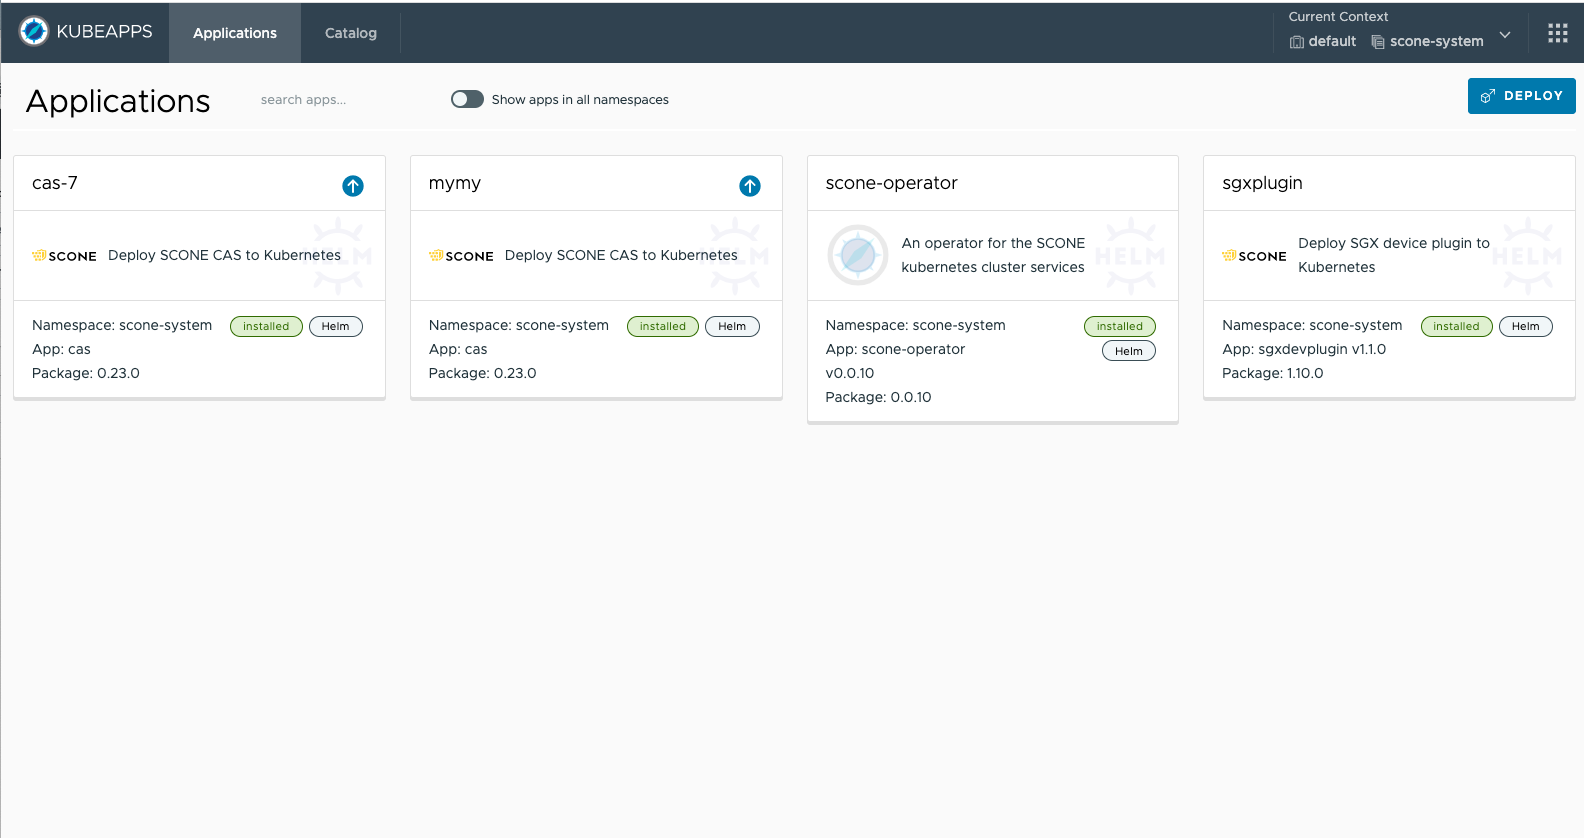
Kubeapps is a dashboard that can show you all running applications. You can select an application for inspection.
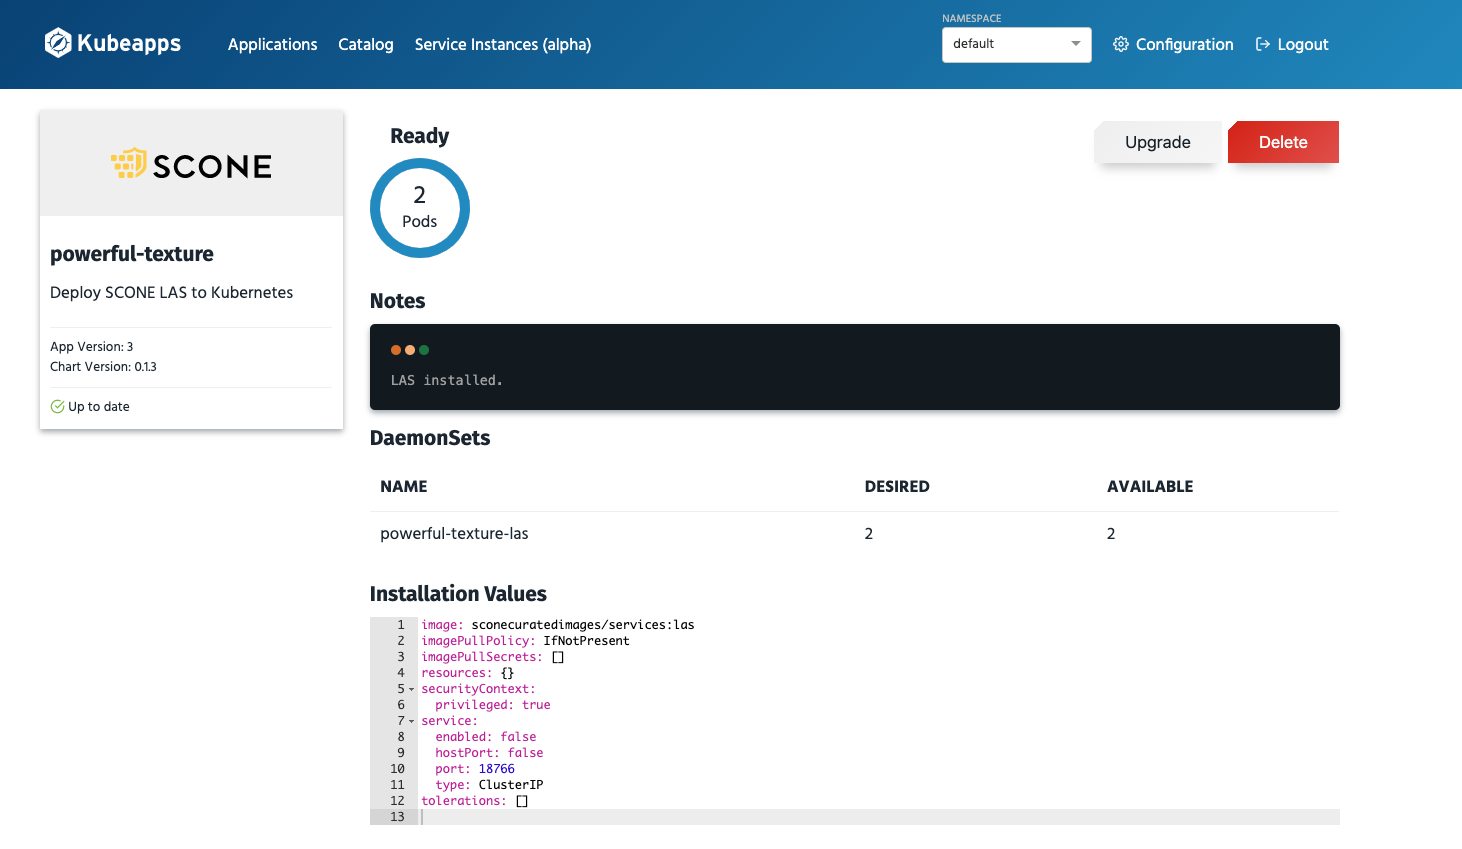
Inspecting LAS
A view of the LAS application that we started above, will look as follows:
Software Updates
Kubeapps shows that software updates are available in the dashboard view as well as for the individual applications:
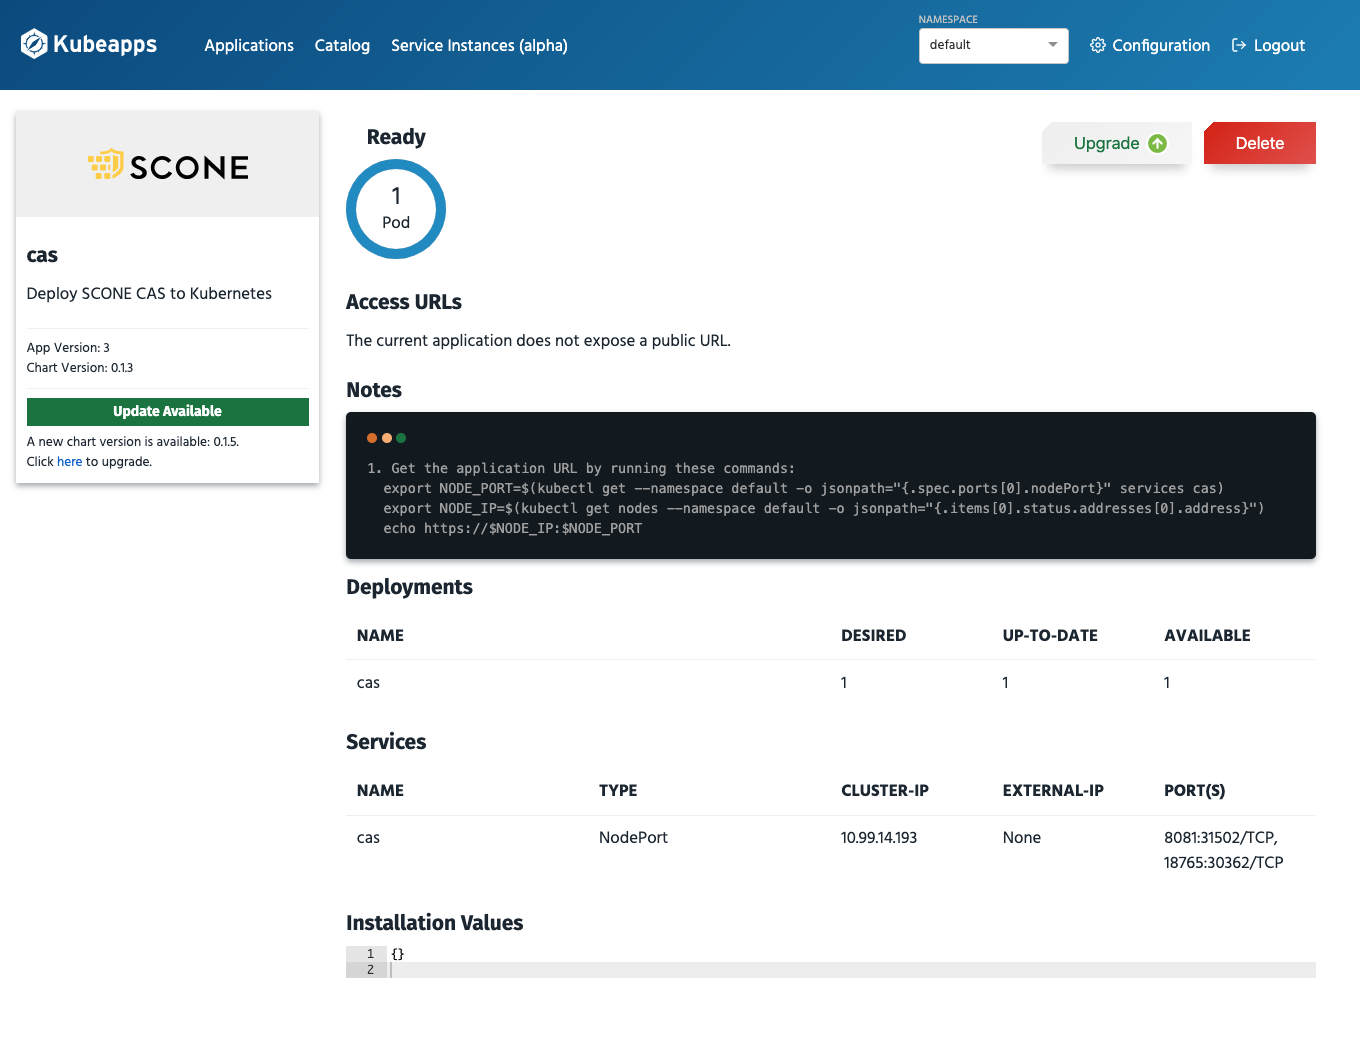
Note that before you press Upgrade, you need to ensure that your policy permits this upgrade. This requires that your policy is set up to permit software updates. If software updates are not permitted, the services will not be permitted to get access to its secrets. Hence, one would need to downgrade the service again.
Deploying Kubeapps
sconeapps is a private Helm repository. Hence, we need to grant you access and you need a GitHub token to access the sconeapps repo.
Define an environment variable that contains this token:
export GH_TOKEN=...Use the token to give Kubeapps access to the sconeapps repository:
if [ -z "$GH_TOKEN" ] ; then
  echo "You need to set you github token: https://github.com/settings/tokens/new"
else
  cat > kubeapps_values.yml <<EOF
  apprepository:
    initialRepos:
      - name: sconeapps
        url: https://${GH_TOKEN}@raw.githubusercontent.com/scontain/sconeapps/master/
      - name: bitnami
        url: https://charts.bitnami.com/bitnami
EOF
fi
You can now start Kubeapps with the help of helm as follows:
helm repo add bitnami https://charts.bitnami.com/bitnami
helm repo update
kubectl create namespace  kubeapps || echo "Does namespace 'kubeapps' already exists?"
helm install -f kubeapps_values.yml kubeapps --namespace kubeapps bitnami/kubeapps --set useHelm3=true
Port Forwarding
To display the dashboard on your browser, you need to forward the kubeapp port to your local machine. Say, you want to present this on localhost:9090, then you can forward the kubeapp port as follows:
kubectl port-forward -n kubeapps services/kubeapps 9090:80The Kubeapps dashboard can now be viewed at:
Access Control
For production mode, you should define a role-based access control. For testing, you might want to create a simple service account:
kubectl create serviceaccount kubeapps-operator
kubectl create clusterrolebinding kubeapps-operator --clusterrole=cluster-admin --serviceaccount=default:kubeapps-operator
To log into the Kubeapps dashboard, you need to determine the API Token:
APITOKEN=$(kubectl get -n default secret $(kubectl get -n default serviceaccount kubeapps-operator -o jsonpath='{.secrets[].name}') -o go-template='{{.data.token | base64decode}}' && echo)
echo $APITOKEN
Deploying a confidential Memcached with the Kubeapps dashboard
Prerequisites
- Kubeapps setup done, including port forwarding to access the dashboard and the determined API Token.
- Clone this repo and go to the repo's root dir.
Upload policies
To deploy Memcached with Kubeapps, you need to upload the policies to CAS first. In this example, we also use a Memcached client to see Memcached in action. In this case, the Memcached session exports a certificate and a key to be used by the client since the Memcached has TLS enabled.
Submit the policies with the help of SCONE CLI:
alias scone="docker run -it --rm \
    -v /var/run/docker.sock:/var/run/docker.sock \
    -v \"$HOME/.docker/config.json:/root/.docker/config.json\" \
    -v \"\$PWD:/root\" \
    -w /root \
    registry.scontain.com/community/cli "
scone ./upload_policies.shDeploy a new release using the Kubeapps dashboard
Search for memcached in Kubeapps catalog.
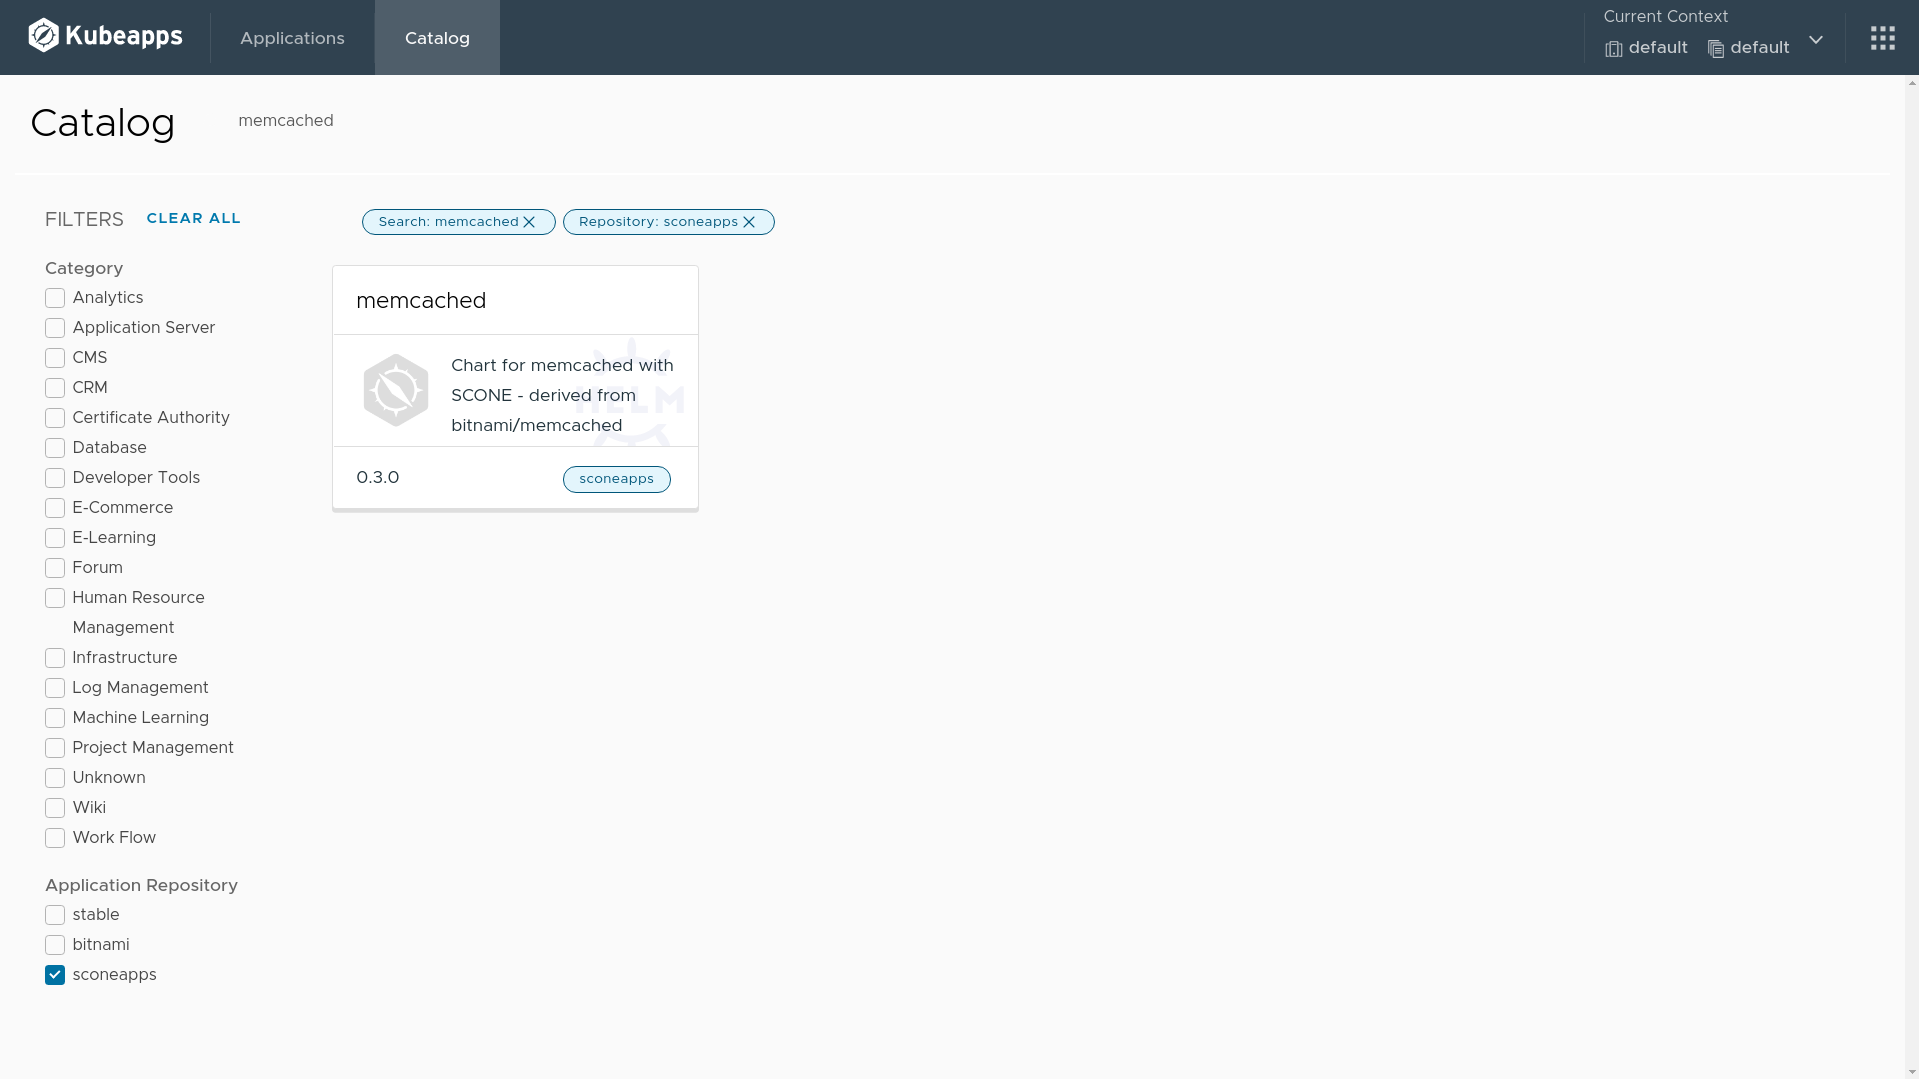
Click on the deploy button.
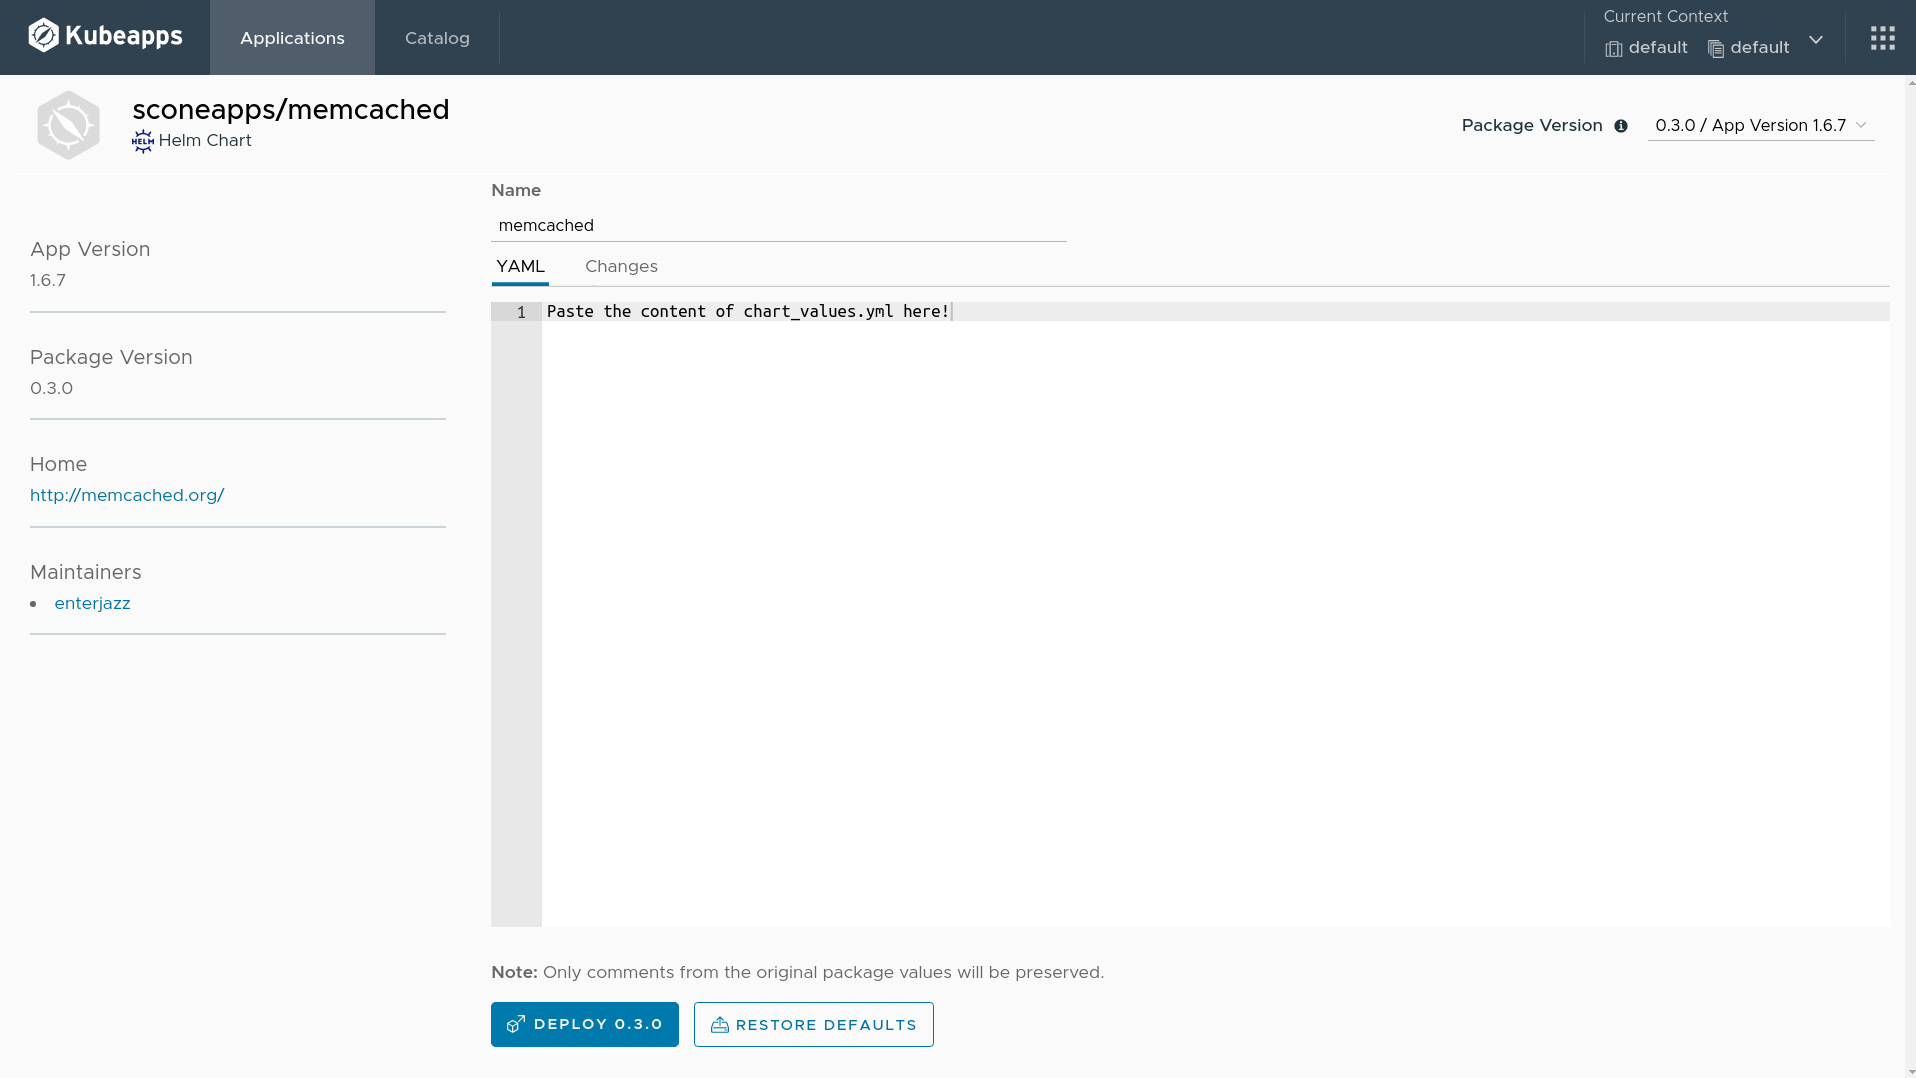
Fill the release name on the top with memcached.
Delete the content of the YAML text field. Copy the content of the file chart_values.yml generated by the previous step in the terminal and paste into the text field.
Now, click on deploy 0.3.0 button.
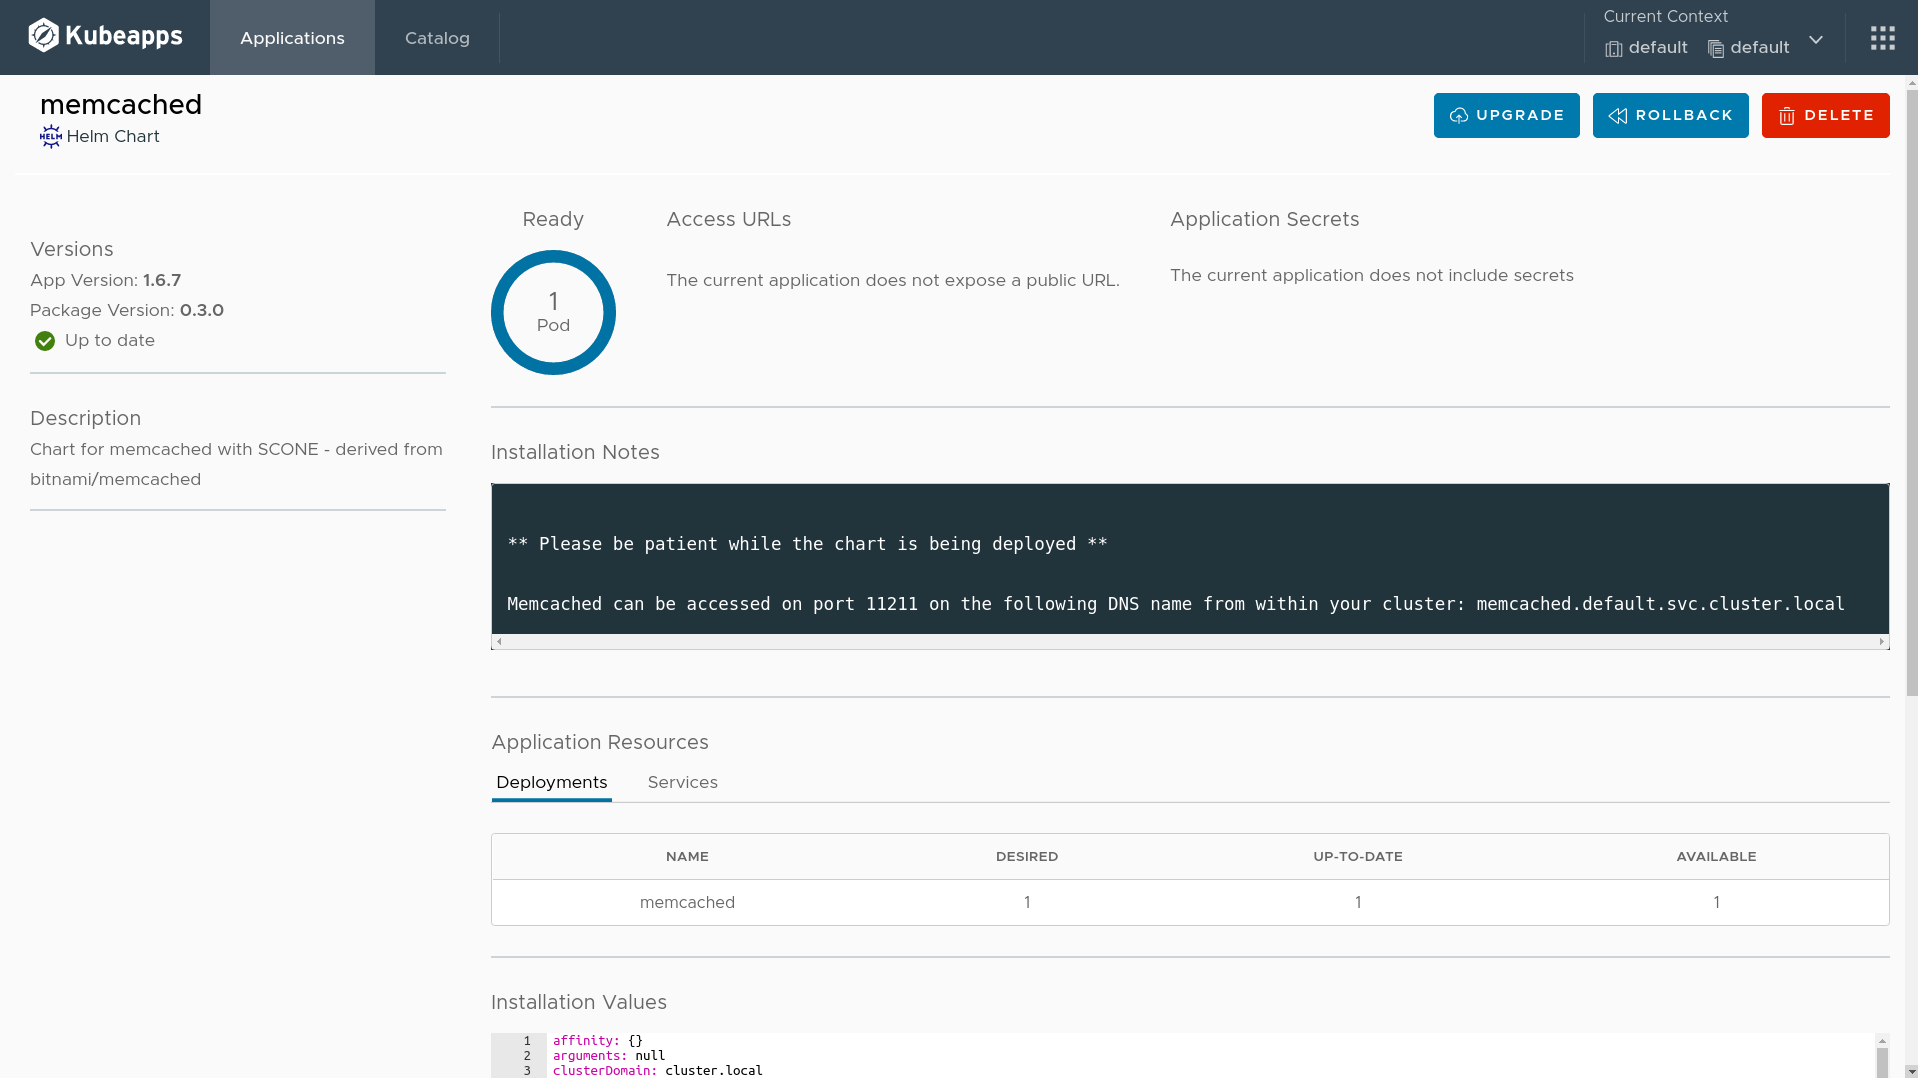
After a few seconds, you will see one Pod ready, like in the following figure.
Deploy a client to see Memcached in action
Load the environment variables generated by the upload policies step.
source client_envApply the Memcached client to see the Memcached in action.
envsubst < client_deployment.yml | kubectl apply -f -You can see the logs in using the following command.
kubectl logs -f $(kubectl get pods -o=jsonpath='{.items[0].metadata.name}' \
    -l app=memcached-client)