Eclipse Integration
In this section, we explain how to set up the Eclipse IDE such that you can develop and in particular, code that executed inside of an enclave. The instructions have been tested on Ubuntu 18.04.
Installing Eclipse
- Download the Eclipse IDE for C/C++ Developers for Linux 64-bit from https://www.eclipse.org/downloads/packages/
- Extract it to a suitable location, e.g.
tar -xzf "eclipse-cpp-2019-03-R-linux-gtk-x86_64.tar.gz" -C ~/ - (optional) If you want to have a desktop entry for eclipse, open or create
~/.local/share/applications/.desktopand add the following content:[Desktop Entry] Comment=Eclipse Terminal=false Name=Eclipse Exec=/home/myusername/eclipse/eclipse Type=Application Icon=/home/myusername/eclipse/icon.xpm(Make sure to adapt the paths accordingly.)
Creating a workspace
- Create a new folder as your workspace, e.g.:
mkdir ~/eclipse-workspace - Clone or copy the code you want to work with into the workspace, e.g.:
cd ~/eclipse-workspace && git clone ... - Start Eclipse! (Use the desktop entry or run
~/eclipse/eclipse) - When prompted, select the created workspace folder and Launch
- Click on Workbench at the top right
Configure Eclipse for developing applications using SCONE
We show the steps to integrate SCONE with Eclipse. We assume that you have already installed
scone-gcc and scone-gdb one the machine your are now installing Eclipse:
- In Eclipse, select File > Import... > C/C++ > Existing Code as Makefile Project > Next
- Existing Code Location: Select
<your-path-to-workspace>/<path_to_project>/<your_project>. - Select
Linux GCCas Toolchain - Click Finish
- Right-click the
<your_project>project, select Properties > C/C++ Build > Environment - Add the following entries:
CC=scone-gcc,CFLAGS=-g -Og,PATH=<your-build-directory>/built/bin(Tick Add to all configurations forPATH. Your regularPATHwill be added automatically.)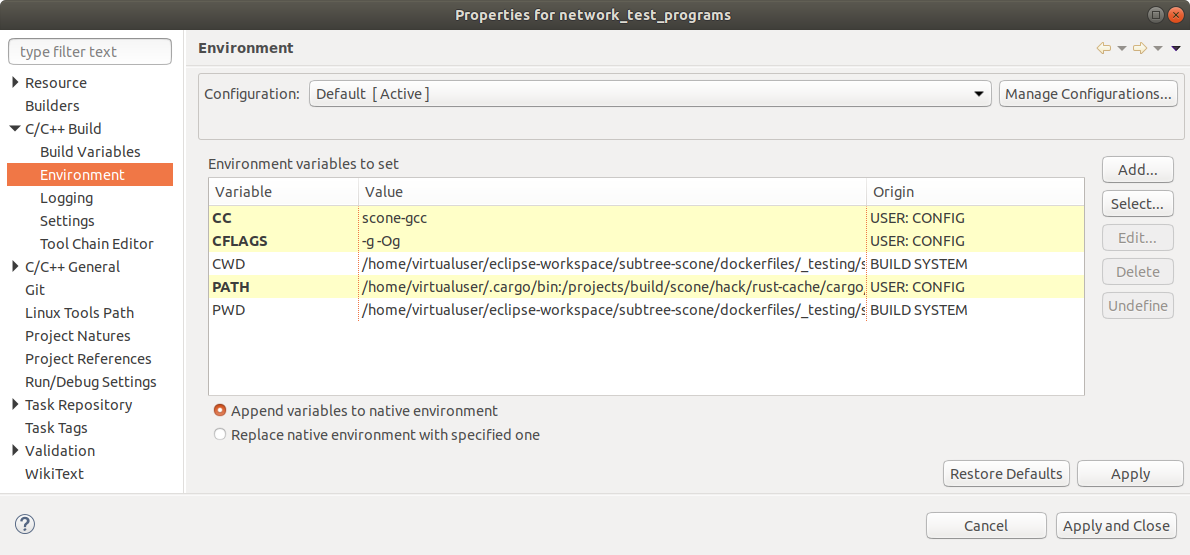
- Apply and Close
- Press Ctrl+B to build. Both SCONE (if configured) and the test applications will be built.
- While the
<your_project>is selected, Select Run > Debug configurations... - Double-click C/C++ Application
- Change Name to
<your_app>, C/C++ Application totarget/<your_app> - Switch to tab Environment and add all environment variables used by SCONE, example:
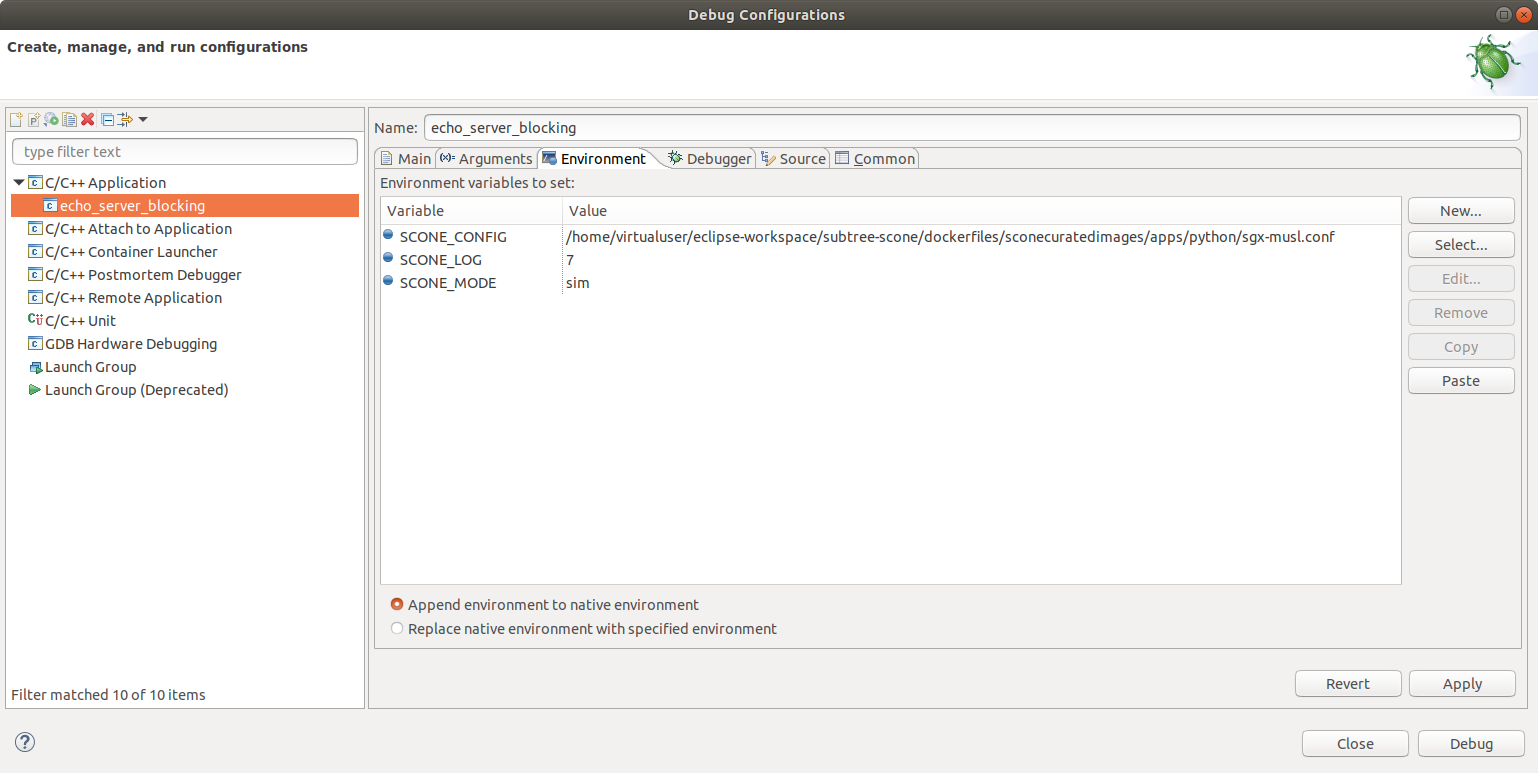
- Switch to tab Debugger and change GDB debugger to
scone-gdb - If the
build-oot.shscript is used to build outside the source directory, it is advised to re-map the sources back to their original location for Debugging purposes: Switch to tab Source and Add... a Path Mapping with NameSCONE mapping, Add Compilation path<your-scone-build-directory>and Local file system path<your-scone-source-directory>(Selecting the local path is tricky, as a button seems to not be rendered correctly. Click on the empty space highlighted in the screenshot below)
- OK > Apply > Debug
- When asked, Switch view
- The debugger is launched and the application is halted in main (can be disabled in the Debugger settings of the launch configuration). You can show local variables, Ctr+Click to follow references, etc. as usual
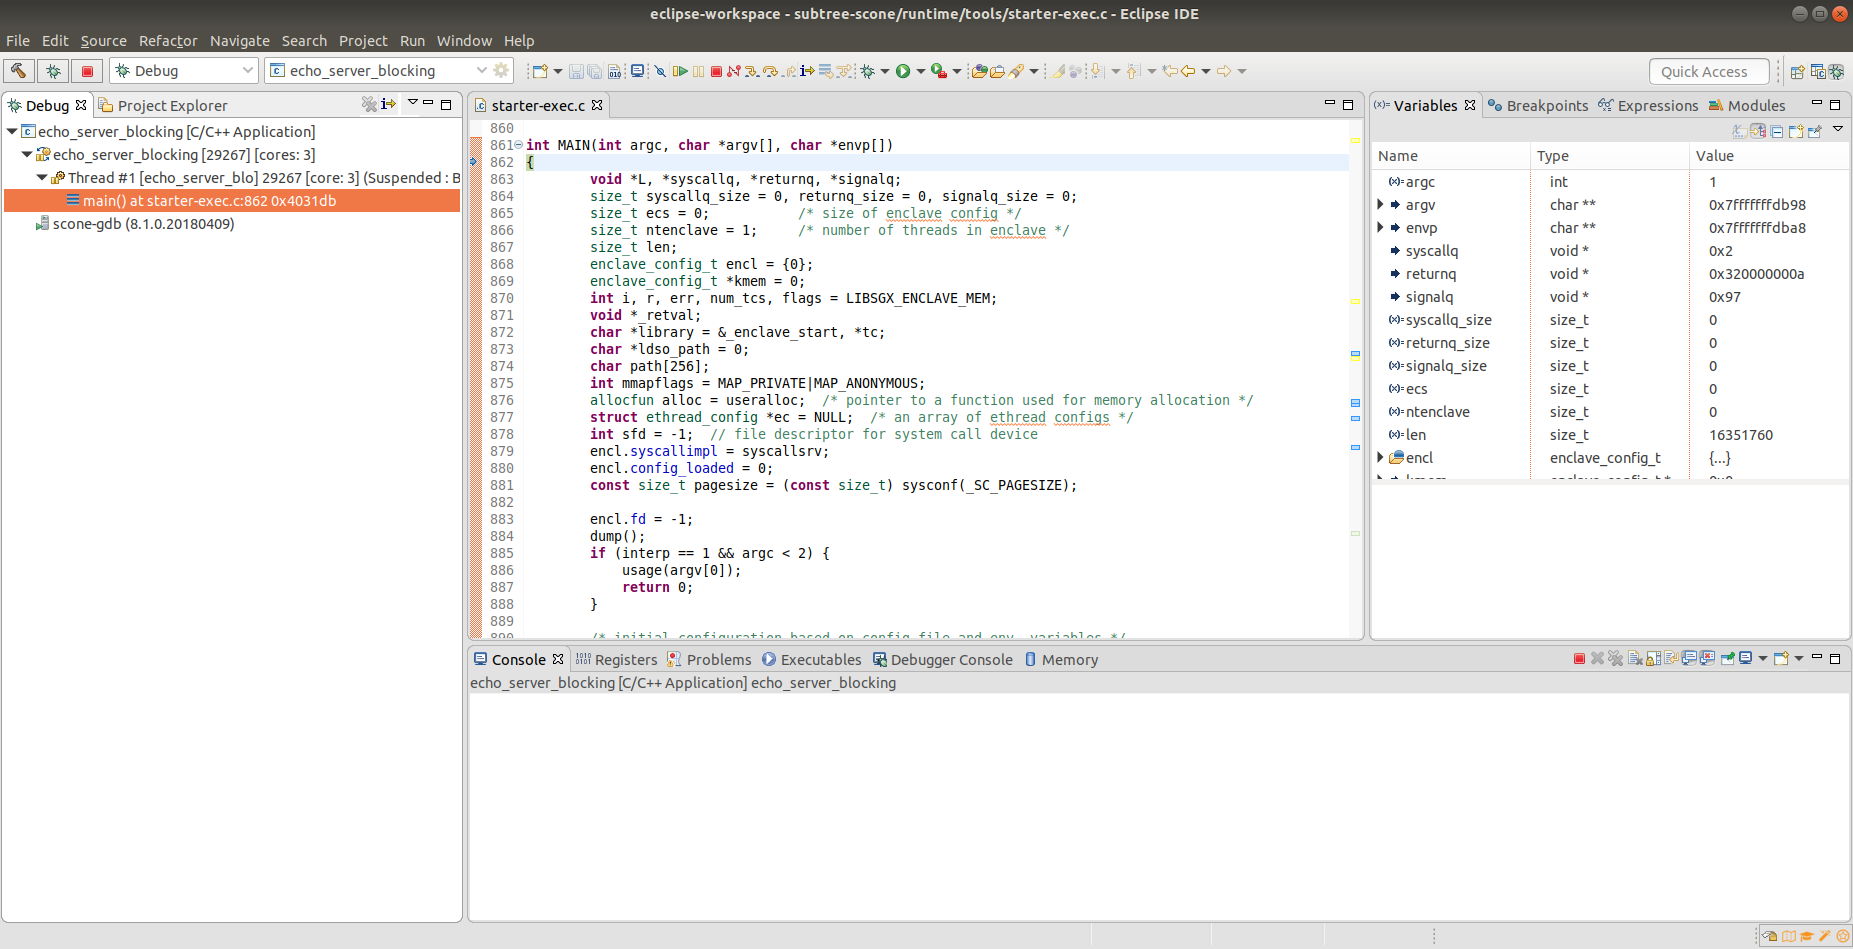
- Continue with F8